param (

   [string]  $userName = "UserName",
   [Parameter(Mandatory=$true)] [string] $value = "SecretPassword"

)

$registryPath = "HKLM:\SOFTWARE\WOW6432Node\TESTAPP"
IF(!(Test-Path $registryPath))

  {

    New-Item -Path $registryPath -Force | Out-Null
    New-ItemProperty -Path $registryPath -Name $userName -PropertyType 'String' -value $value

}

 ELSE {
    New-ItemProperty -Path $registryPath -Name $userName -Value $value -PropertyType 'String' -Force | Out-Null

}Shiva
Modify webconfig connectionstring using powershell
 [CmdletBinding()]
  param ($PT_connectionstring_new =  "newpassword")
  $webConfig = 'D:\Web.config'

Function updateWebConfig($config)
{
$doc = (Get-Content $config) -as [Xml]
$root = $doc.get_DocumentElement();
$activeConnection = $root.connectionStrings.SelectNodes("add")|?{$_.name -eq "PROD"};
$activeConnection.SetAttribute("connectionString",$PT_connectionstring_new);
$doc.Save($config)
}

updateWebConfig($webConfig)
Add Registry Setting using puppet windows
 registry_value {'HKLM\SYSTEM\CurrentControlSet\Control\Lsa\FipsAlgorithmPolicy':
    ensure => present,
    type   => string,
    data   =>   '1',
}IIS Authentication info using puppet
iis_application { 'myapp':
  ensure             => 'present',
  sitename           => 'mysite',
  physicalpath       => 'C:\\inetpub\\app',
  authenticationinfo => {
    'basic'     => true,
    'anonymous' => false,
  },
}Download remote zip, extract zip and copy files using puppet in windows
#download file from repo
 download_file { 'Download dotnet 4.0' :
  url                   => 'https://repos.shivaprogramming.com/Myapp.ZIP',
  destination_directory => 'D:\downloadapp',
}

#extract zip
 exec { 'Unzip Folder':
        command =>'Expand-Archive -Path D:\downloadapp\Myapp.ZIP -DestinationPath D:\downloadapp\DEST',
        provider  => powershell,
        logoutput =>    true,
        subscribe => Download_file['Download dotnet 4.0'],
    }
#copy resources to the destination

 file { 'D:\CA_Websites\MyApp':  #destination
 ensure    => 'directory',
 recurse   => true,
 source    => 'D:\downloadapp\DEST',
 subscribe => Exec['Unzip Folder'],
  }
Install IIS using puppet code
# copy IIS files into inetpub folder
file { 'C:\\inetpub\\minimal\\' :
ensure  => 'directory',
source  => 'C:\\moveto\\ACME',
recurse => true,
}

#create  application pool
iis_application_pool { 'ACME':
  ensure                  => 'present',
  state                   => 'started',
  managed_pipeline_mode   => 'Integrated',
  managed_runtime_version => 'v4.0',
} ->

# create Default Website
iis_site { 'Default Web Site':
  ensure          => 'started',
  #physicalpath    => 'C:\\inetpub',
  applicationpool => 'ACME',
} ->
#create IIS  application
iis_application {'ACME':
  ensure          => present,
  applicationname => 'ACME', # <-- Does not need to match the title
  sitename        => 'Default Web Site',
  physicalpath => 'C:\\inetpub\\minimal',
} ->
#create IIS application  and convert to application
iis_application{'/ACME/UI':
  applicationpool => 'ACME',
  ensure          => 'present',
  sitename        => 'Default Web Site',
physicalpath => 'C:\\inetpub\\minimal\\UI'
}
Docker commands
docker ps -> List all the running docker processes. ps means the process starts
docker run hello-world => docker run image name
docker run – p 80:80 nginx
80:80=> Port 80 on host and port 80 container
nginx is a web server running on port 80
docker stop – container id
docker start container name
Create docker image
# Sample of docker file
# Use a container with Go pre-installed
FROM quay.io/projectquay/golang:1.17

# Copy our source file into the container
COPY src/hello-world.go /go/hello-world.go

# Set the default environment variables
ENV MESSAGE "Welcome! You can change this message by editing the MESSAGE environment variable."
ENV HOME /go

# Set permissions to the /go folder (for OpenShift)
RUN chgrp -R 0 /go && chmod -R g+rwX /go

# Just documentation.
# This container needs Docker or OpenShift to help with networking
EXPOSE 8080

# OpenShift picks up this label and creates a service
LABEL io.openshift.expose-services 8080/http

# OpenShift uses root group instead of root user
USER 1001

# Command to run when container starts up
CMD go run hello-world.go
docker build .
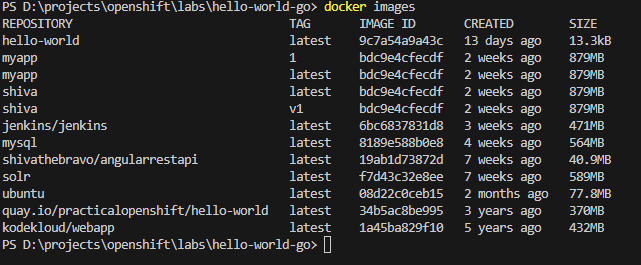
# . current directoryshow list of images => docker images
Tag docker image
docker build -t shiva:v1 .

Check the Status of a docker image
docker ps
#  show the running container check the status field
Remove the image
docker rmi image nameAdding port
# -p (host port):(container port)
docker run -it  -p 8080:8080  quay.io/practicalopenshift/hello-world

Running the docker help page offline
docker run -p 4000:4000 docs/docker.github.io
Add name and run interactive mode
docker run -p 4000:4000 -it --name shivadoc docs/docker.github.io
Find more info about container
docker inspect (container name or ID)
you can find the ip address of the container
Stop all the container
docker ps-q
docker stop $(docker ps -q)
Remove all the containers
docker ps -aq
docker rm $(docker ps-aq)
docker image prune
docker volume ls
docker volume ls -f dangling=true
Deploy to Private Registry
docker run -d -p 1000:1000 -name regsitry register:version

docker image tag my-imagename localhost:1000/my-imagename

docker push localhost:1000/my-imagename

docker pull localhost:1000/my-imagename

dpocker pull 192.168.1.1:1000/my-imagename
Install Oracle client using rsp file ,powerShell and puppet
Create a ps1 file for eg oracleclientInstall.ps1
#oracelclientInstall.ps1
cmd.exe
C:\MyTemp\Ora11gx32\setup.exe -responseFile "C:\MyTemp\Ora11gx32\response\runtime.rsp" -silent
exit
Calling powershell file via Puppet exec resource
#Installoracel.pp
exec { 'RegisterOracle':
  command   => file('C:\Temp\installoracleclientruntime.ps1'),
  provider  => powershell,
  logoutput => true,
}
puppet agent -t Installoracle.pp
exec{'oracle':
command  => "setup.exe -silent -responseFile E:/software/Win64_120102_client/client12c_64.rsp ",
path  => 'c:\apps',
}Run PS file using puppet exec command
in registerDLL.ps1 file
#registerDLL.ps1
$location=Set-Location -Path C:\Windows\SysWOW64
regsvr32.exe "C:\ProgramFiles(x86)_shiva\HashMgr\HashMgr.dll"
exec { 'RegisterDll':
  command   => file('C:\Temp\puppetcode\registerDLL.ps1'),
  provider  => powershell,
  logoutput => true,
}
Enable IIS AnonymousAuthentication using exec and puppet
exec{‘set-anon-auth’:
command => ‘Set-WebConfigurationProperty -filter /system.WebServer/security/authentication/AnonymousAuthentication -name Enabled -Value True -location mysite’,
provider => ‘powershell’,
logoutput => true
}
Install exe file using puppet
package { “Access Database Engine Component”:
ensure => installed,
source => ‘C:\shivaTemp\AccessDatabaseEngine.exe’,
install_options => [ ‘/passive’, { ‘INSTALLDIR’ => ‘C:\shivaTemp’ } ],
}
$install_dir = ‘C:\shivaTemp’
package { “Access Database Engine Component”:
ensure => installed,
provider => ‘windows’,
source => ‘C:\shivaTemp\AccessDatabaseEngine.exe’,
install_options => [ ‘/passive’, { ‘INSTALLDIR’ => $install_dir } ],
}