The oc rsh command in OpenShift allows you to “step inside” a running container and interact with it as if you were using a regular command prompt. It’s like opening a door to the container and being able to run commands and access files inside it.
You need a tool called oc (OpenShift command-line tool) to use oc rsh. It helps you connect to an OpenShift cluster.
You find the container you want to access within a group of containers called a “pod.”
You use the oc rsh a command followed by the pod’s name to enter the container. It’s like opening the door to the container.
Once inside, you can run commands and navigate the container’s files as if you were using a regular command prompt. You can check logs, run scripts, and do other things that the container allows.
When you’re done, you exit the container by typing exit or pressing Ctrl+D. It’s like closing the door behind you.
Remember, it’s important to be careful when using oc rsh it because you can make changes that affect the container and the application running inside it.
OC delete
The oc delete command in OpenShift is used to delete various resources within an OpenShift cluster. It allows you to remove objects like pods, services, deployments, routes, and more.
A class file in Java has a .class extension. It contains bytecode, which is instruction for Java Virtual Machine, which translates that bytecode into platform-specific machine-level instruction based upon whether the Java program runs on Windows or Linux.
First Java Program.
public class Main {
    public static void main(String[] args) {
        System.out.println("Welcom to Java programming");
    }
}
Scanner class is use to get input from the user in Java
It can parse primitive types and strings using regex.
Scanner input = new Scanner(System.in); //Create an instance of the scanner
System.out.print("Enter a double value: ");
Scanner input = new Scanner(System.in);
double d = input.nextDouble();
System.out.println("Your value is " + d);
Java if condition checks for the decision-making statement based on its true or false condition.
if(condition)
{
   // Statements to execute if the given condition is true

}
---------------------------------
if (condition)
{
   // Run this block if
 condition is true
}
else
{
  // Run this block if
 condition is false
}
-----------------------------------------------------
if (condition)
    statement;
else if (condition)
    statement;
.
.
else
    statement;
Switch
Execute the code based on the value of the switch expression value.
switch (expression)
{
  case value1:
    statement1;
    break;
  case value2:
    statement2;
    break;

  default:
    statementDefault;
}
We’ve all been there. You’re staring at a repetitive task—copying data between spreadsheets, responding to the same customer inquiry for the hundredth time, or manually sorting through hundreds of emails—and suddenly it hits you: This could be automated with AI.
But having the idea is just the beginning. The gap between “I have an idea about AI automation” and a working system that saves hours of manual labor is where most concepts die. This post bridges that gap, showing you how to validate, architect, and build your intelligent automation concept.
Understanding the AI Automation Landscape
Before writing a single line of code or configuring a no-code workflow, you need to understand where your idea fits in the current ecosystem. AI automation isn’t just about replacing human effort; it’s about augmenting decision-making with machine learning capabilities.
Today’s automation landscape operates on three distinct levels:
Rule-based automation follows “if this, then that” logic—reliable but rigid. AI-enhanced automation adds pattern recognition, natural language processing, or computer vision to handle variability. Autonomous AI agents can make decisions, learn from outcomes, and complete multi-step processes with minimal human oversight.
Your idea likely falls into the second or third category, which means you’re not just saving time—you’re enabling capabilities that were previously impossible at scale.
The Three Pillars of Intelligent Automation
Every successful AI automation project rests on three pillars:
Data Infrastructure: Clean, accessible data sources
Intelligence Layer: The AI model or service (OpenAI, Anthropic, open-source LLMs, or specialized ML models)
Integration Fabric: How the system connects to your existing tools (APIs, webhooks, RPA)
Missing any one of these pillars means building on unstable ground. The most common mistake? Jumping to the AI model before ensuring your data is accessible and your integration points are defined.
Mapping Your Idea to Technical Reality
Transforming a vague concept into an executable project requires structured thinking. Start by answering the “Automation Trinity”:
•Trigger: What event starts this process? (A new email, a database update, a scheduled time?)
•Transformation: What intelligence does the AI provide? (Classification, generation, summarization, prediction?)
•Action: What happens to the output? (Send a message, update a record, create a ticket?)
Let’s say your idea is: “I want AI to automatically categorize customer support tickets and draft initial responses.”
Breaking this down:
•Trigger: New ticket created in Zendesk/Intercom
•Transformation: AI analyzes sentiment and topic, then drafts response
•Action: Update ticket priority and post draft reply for human review
The Validation Sprint
Before building, validate with the “Weekend Test”: Can you manually execute this workflow in under 30 minutes? If the logic is too complex for you to explain to a human assistant, your AI isn’t ready to handle it either. Simplify first, then automate.
Building Your First Prototype
Once your idea is mapped, it’s time to build a minimal viable automation (MVA). Here’s a practical example using Python and the OpenAI API to automate content categorization:
return [self.categorizeandsummarize(c) for c in contents]
Usage example
if name == "main":
agent = ContentAutomationAgent("your-api-key")
articles = [
"New breakthrough in quantum computing announced by researchers...",
"10 tips for better work-life balance in remote settings..."
]
results = agent.batch_process(articles)
print(json.dumps(results, indent=2))
This prototype demonstrates the core pattern: input → AI processing → structured output. From here, you’d add integrations—perhaps connecting to your CMS via API or triggering from a Google Sheets update.
Real-World Applications That Started as Ideas
The most successful AI automation projects often begin with specific pain points. Here are three patterns that started as “what if” questions:
Content Operations at Scale
Marketing teams use AI automation to transform raw webinar transcripts into blog posts, social threads, and email newsletters automatically. The workflow extracts key insights, reformats for different channels, and schedules publication—turning a 6-hour task into a 15-minute review process.
Intelligent Customer Routing
Instead of round-robin ticket assignment, AI analyzes incoming messages for urgency and complexity, routing technical issues to senior engineers while handling common FAQs automatically. One SaaS company reduced response time by 70% using this approach.
Document Processing Pipelines
Legal and finance teams automate invoice processing and contract review. The system extracts key data points, checks against compliance rules, and flags anomalies for human review—processing hundreds of documents in minutes rather than days.
Overcoming Common Roadblocks
Even great ideas face implementation challenges:
The Hallucination Problem: AI makes confident mistakes. Always include human-in-the-loop checkpoints for high-stakes decisions.
API Rate Limits: Your automation is only as fast as your slowest API. Build in retry logic and queue systems for bulk operations.
Context Windows: Large language models have token limits. For long documents, implement chunking strategies:
Python
def chunktext(text: str, maxtokens: int = 3000) -> List[str]:
"""Split text into processable chunks"""
words = text.split()
chunks = []
current_chunk = []
current_length = 0
for word in words:
current_length += len(word) + 1  # +1 for space
if currentlength > maxtokens * 4:  # Approximate tokens
chunks.append(" ".join(current_chunk))
current_chunk = [word]
current_length = len(word)
else:
current_chunk.append(word)
if current_chunk:
chunks.append(" ".join(current_chunk))
return chunks
Your Next Steps
You have the idea. You have the context. Now execute:
Sketch your workflow on paper—triggers, transformations, actions
Choose your stack: No-code tools like Make or Zapier for simple flows; Python/Node.js for complex logic
Start with one input/output pair before scaling to batch processing
Measure time saved to prove ROI
The barrier to AI automation has never been lower. The tools are accessible, the APIs are documented, and the infrastructure is mature. Your idea deserves to exist beyond the “what if” stage.
AI automation workflow diagram showing data flow from input to AI processing to action
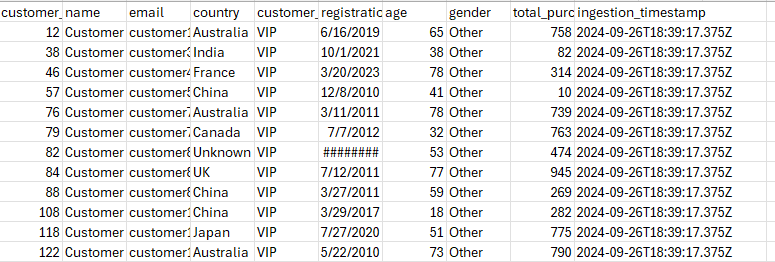
from pyspark.sql.functions import *
customer=spark.sql("Select * FROM workspace.customerdata.customer")
display(customer)
df.printSchema()
df1=df.filter(df["customer_type"]=="VIP")
df0=customer.filter(col("customer_type")=="Regular")
display(df1)
# filter by customer_type and country
df1=customer.filter((customer.customer_type=="VIP") & (customer.country=='USA'))
# where condition
df2=customer.where((customer.customer_type=="VIP") & (customer.country=='USA'))
# or operator
df3=customer.where((customer.customer_type=="VIP") | (customer.country=='USA'))
Add new column withColumn Function
from pyspark.sql.functions import * customer=spark.sql("Select * FROM workspace.customerdata.customer") customer =customer.withColumn("Salary", col("age")* 1000) customer.printSchema() display(customer)